

What do you do when you move to the burbs for some peace and quite but don't have ALL the posh restaurants in your immediate area? You make your own swanky bistro of course!
When we bought this house in November 2016 we knew we would make some changes. We loved the backyard but felt it really "needed more". Defining more wasn't that easy- It had a great green area, unground pool with sundeck, covered patio putting green, turf we actually love and even some awesome concrete rectangles.
As we continued to decorate our home over the past year, we also started noticing that the outside lacked the feel as the house and we wanted the atmosphere to match inside and out. So now what? Well there was of course hours days weeks... who knows how long of planning. See when you design homes for clients or to flip its so much easier. Now here you are at your own home asking yourself if its worth it? Can you live with it? Is the price excessive? No don't be cheap get what you want. Complete angel and devil on each shoulder things!

So earlier this spring we started planning and by April we had pulled the trigger. Here was the first thing we never thought of-- its Hot AF By May- June..... So hot that how could you A- touch any of the appliances B- paint in the heat it dries so fast C- Grout, if you are not the actual looney tunes speedy mouse then forget it! and finally D- pour a counter.
All the planning and some more waiting we had wait until the heat subsided AND of course we had a couple flip projects that were finishing up. Side note my family basically does not like me whatsoever the last 2 weeks of a project- more on that in another post but it does end well!
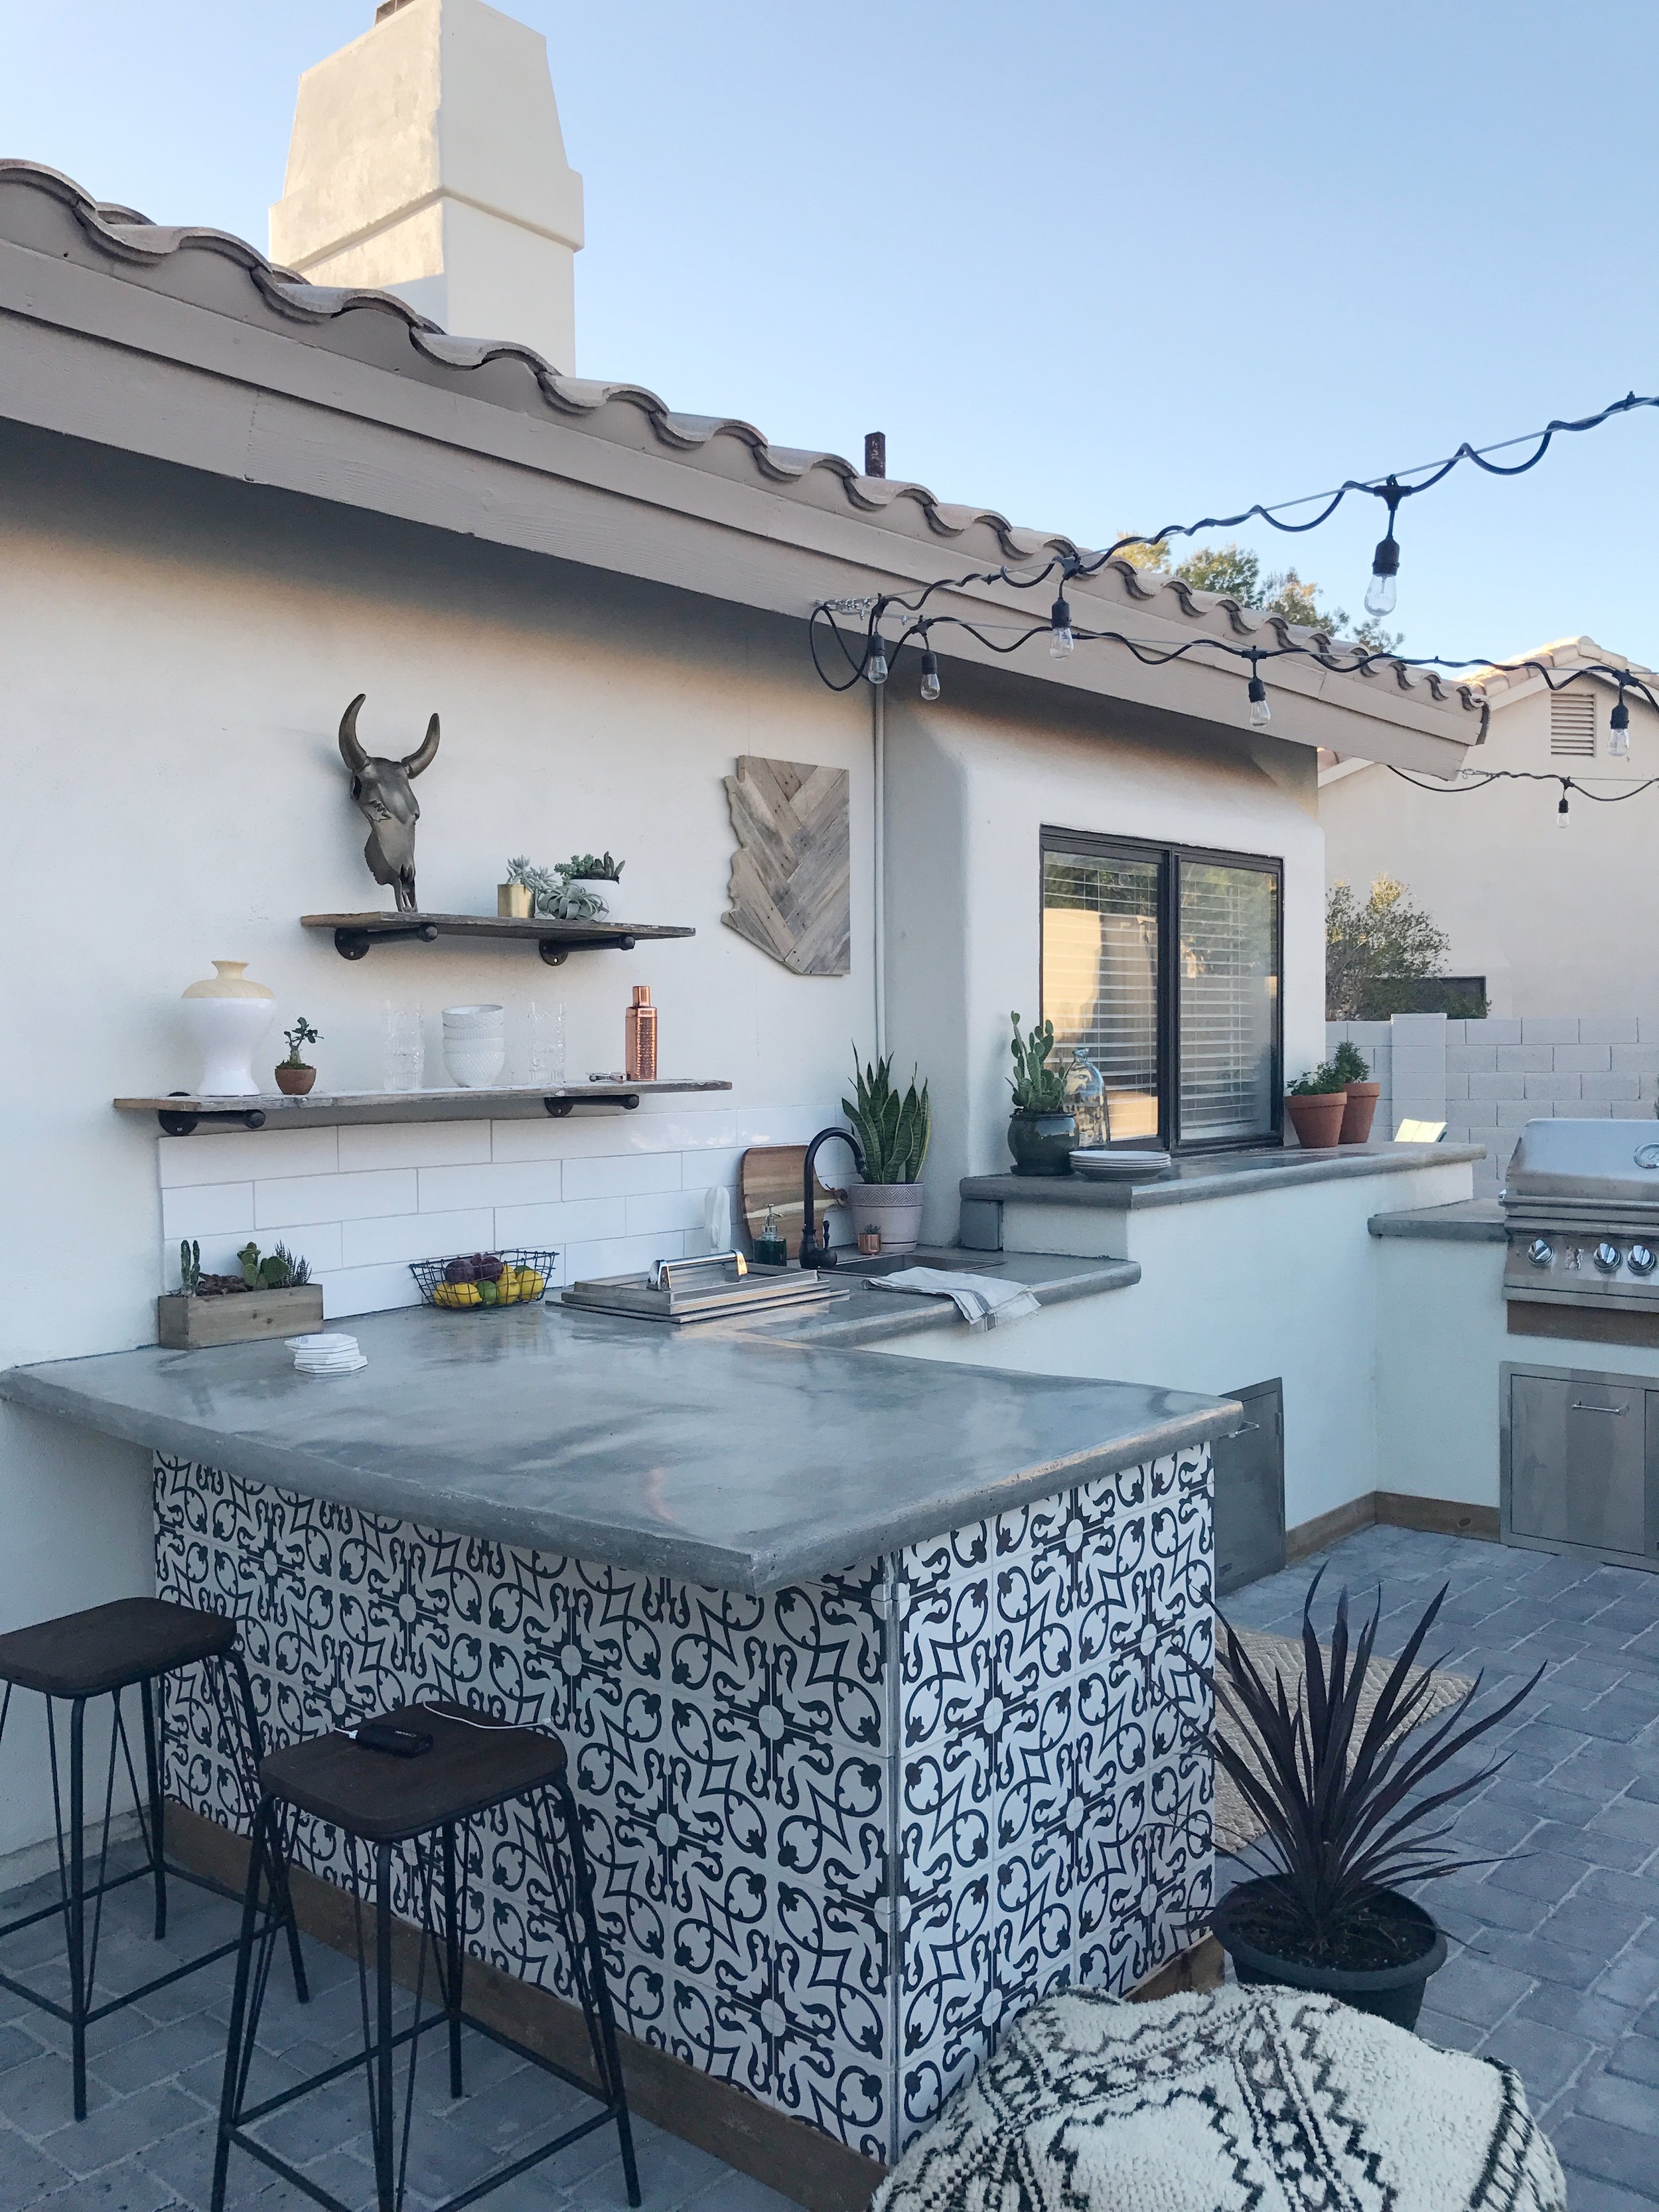
What was remarkable about how this turned out is that I had looked at so many photos, pintrest posts etc and this all came right together BUT a little different but still better. My vision was to create a complementary "bring indoors outdoors" concept. I'm leaning a tad modern farmhouse these days but I still like some rustic touches after all we are outside.
Some things I considered - I do in all houses - 1. What is the best use of the space 2. How functional will the remaining space be? 3- Go big or ....well lets take a peek when I'm done designing and tone it down if necessary. 4. Resale value of the house- are my appliances and finishes in line or am I straight up overboard (that is not always bad sometimes theres a method to my madness) 5- Last but not least budget- what did we choose, are there less expensive options, trade-offs for the best things etc.
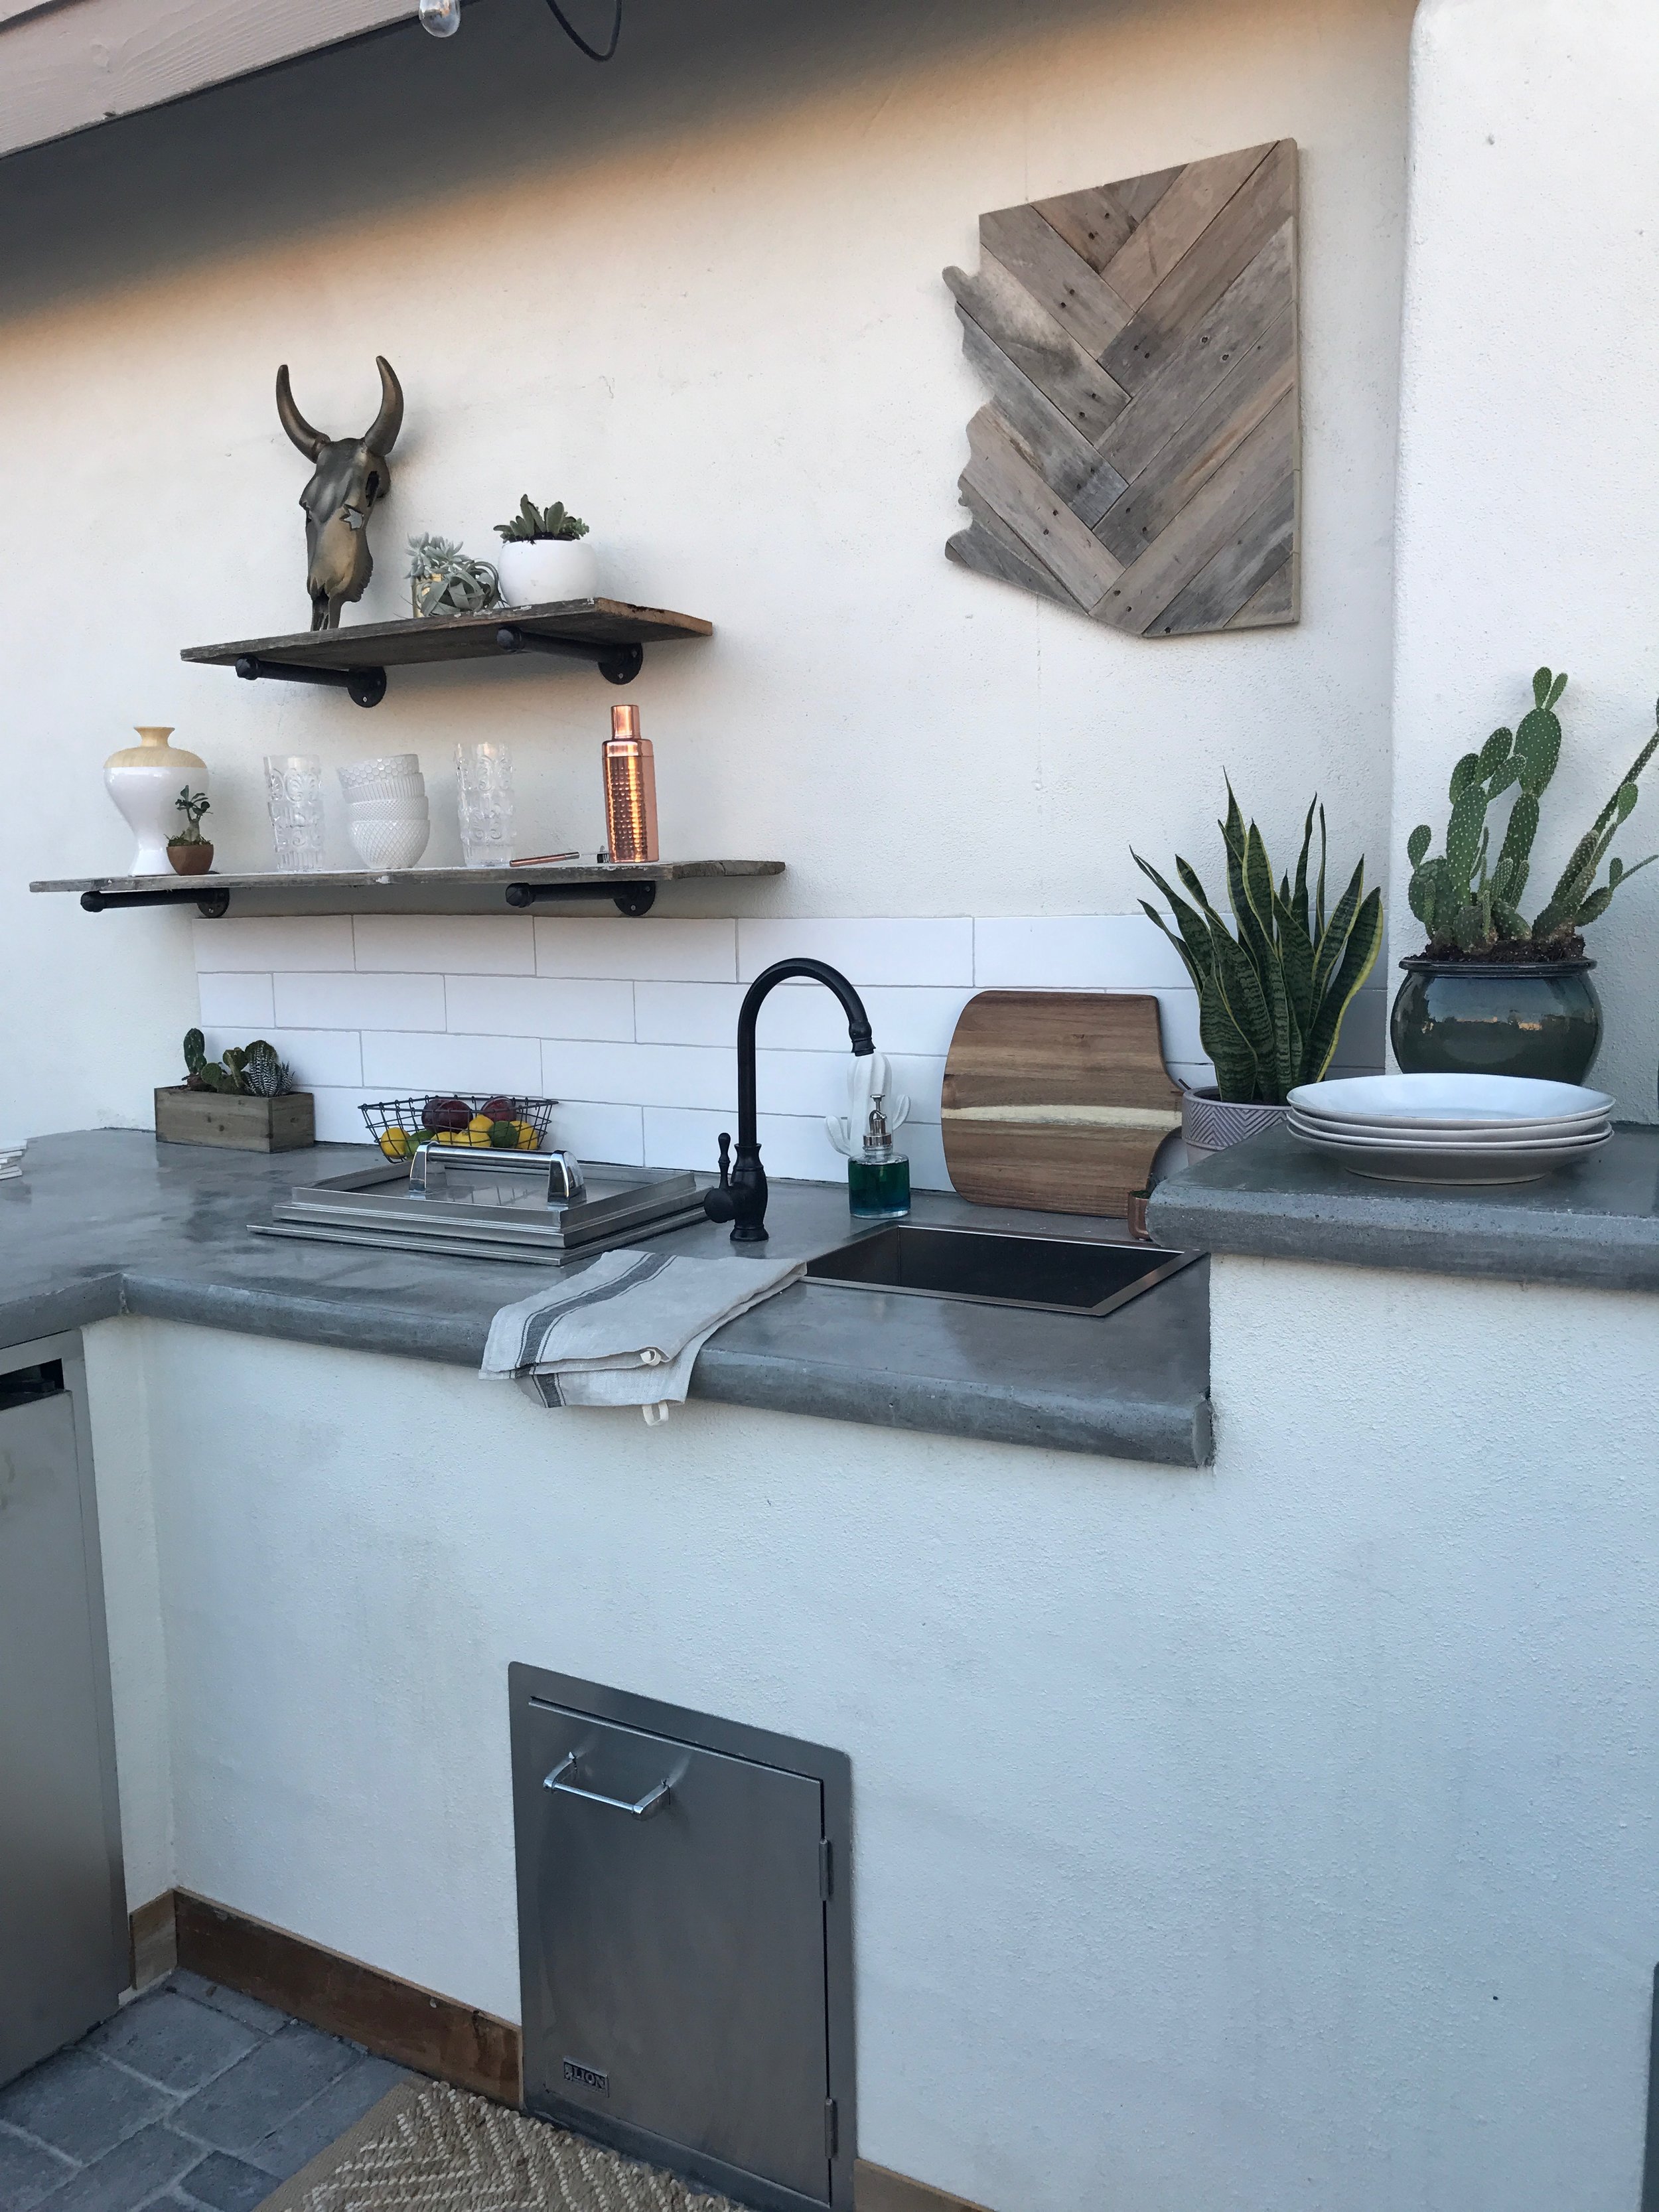
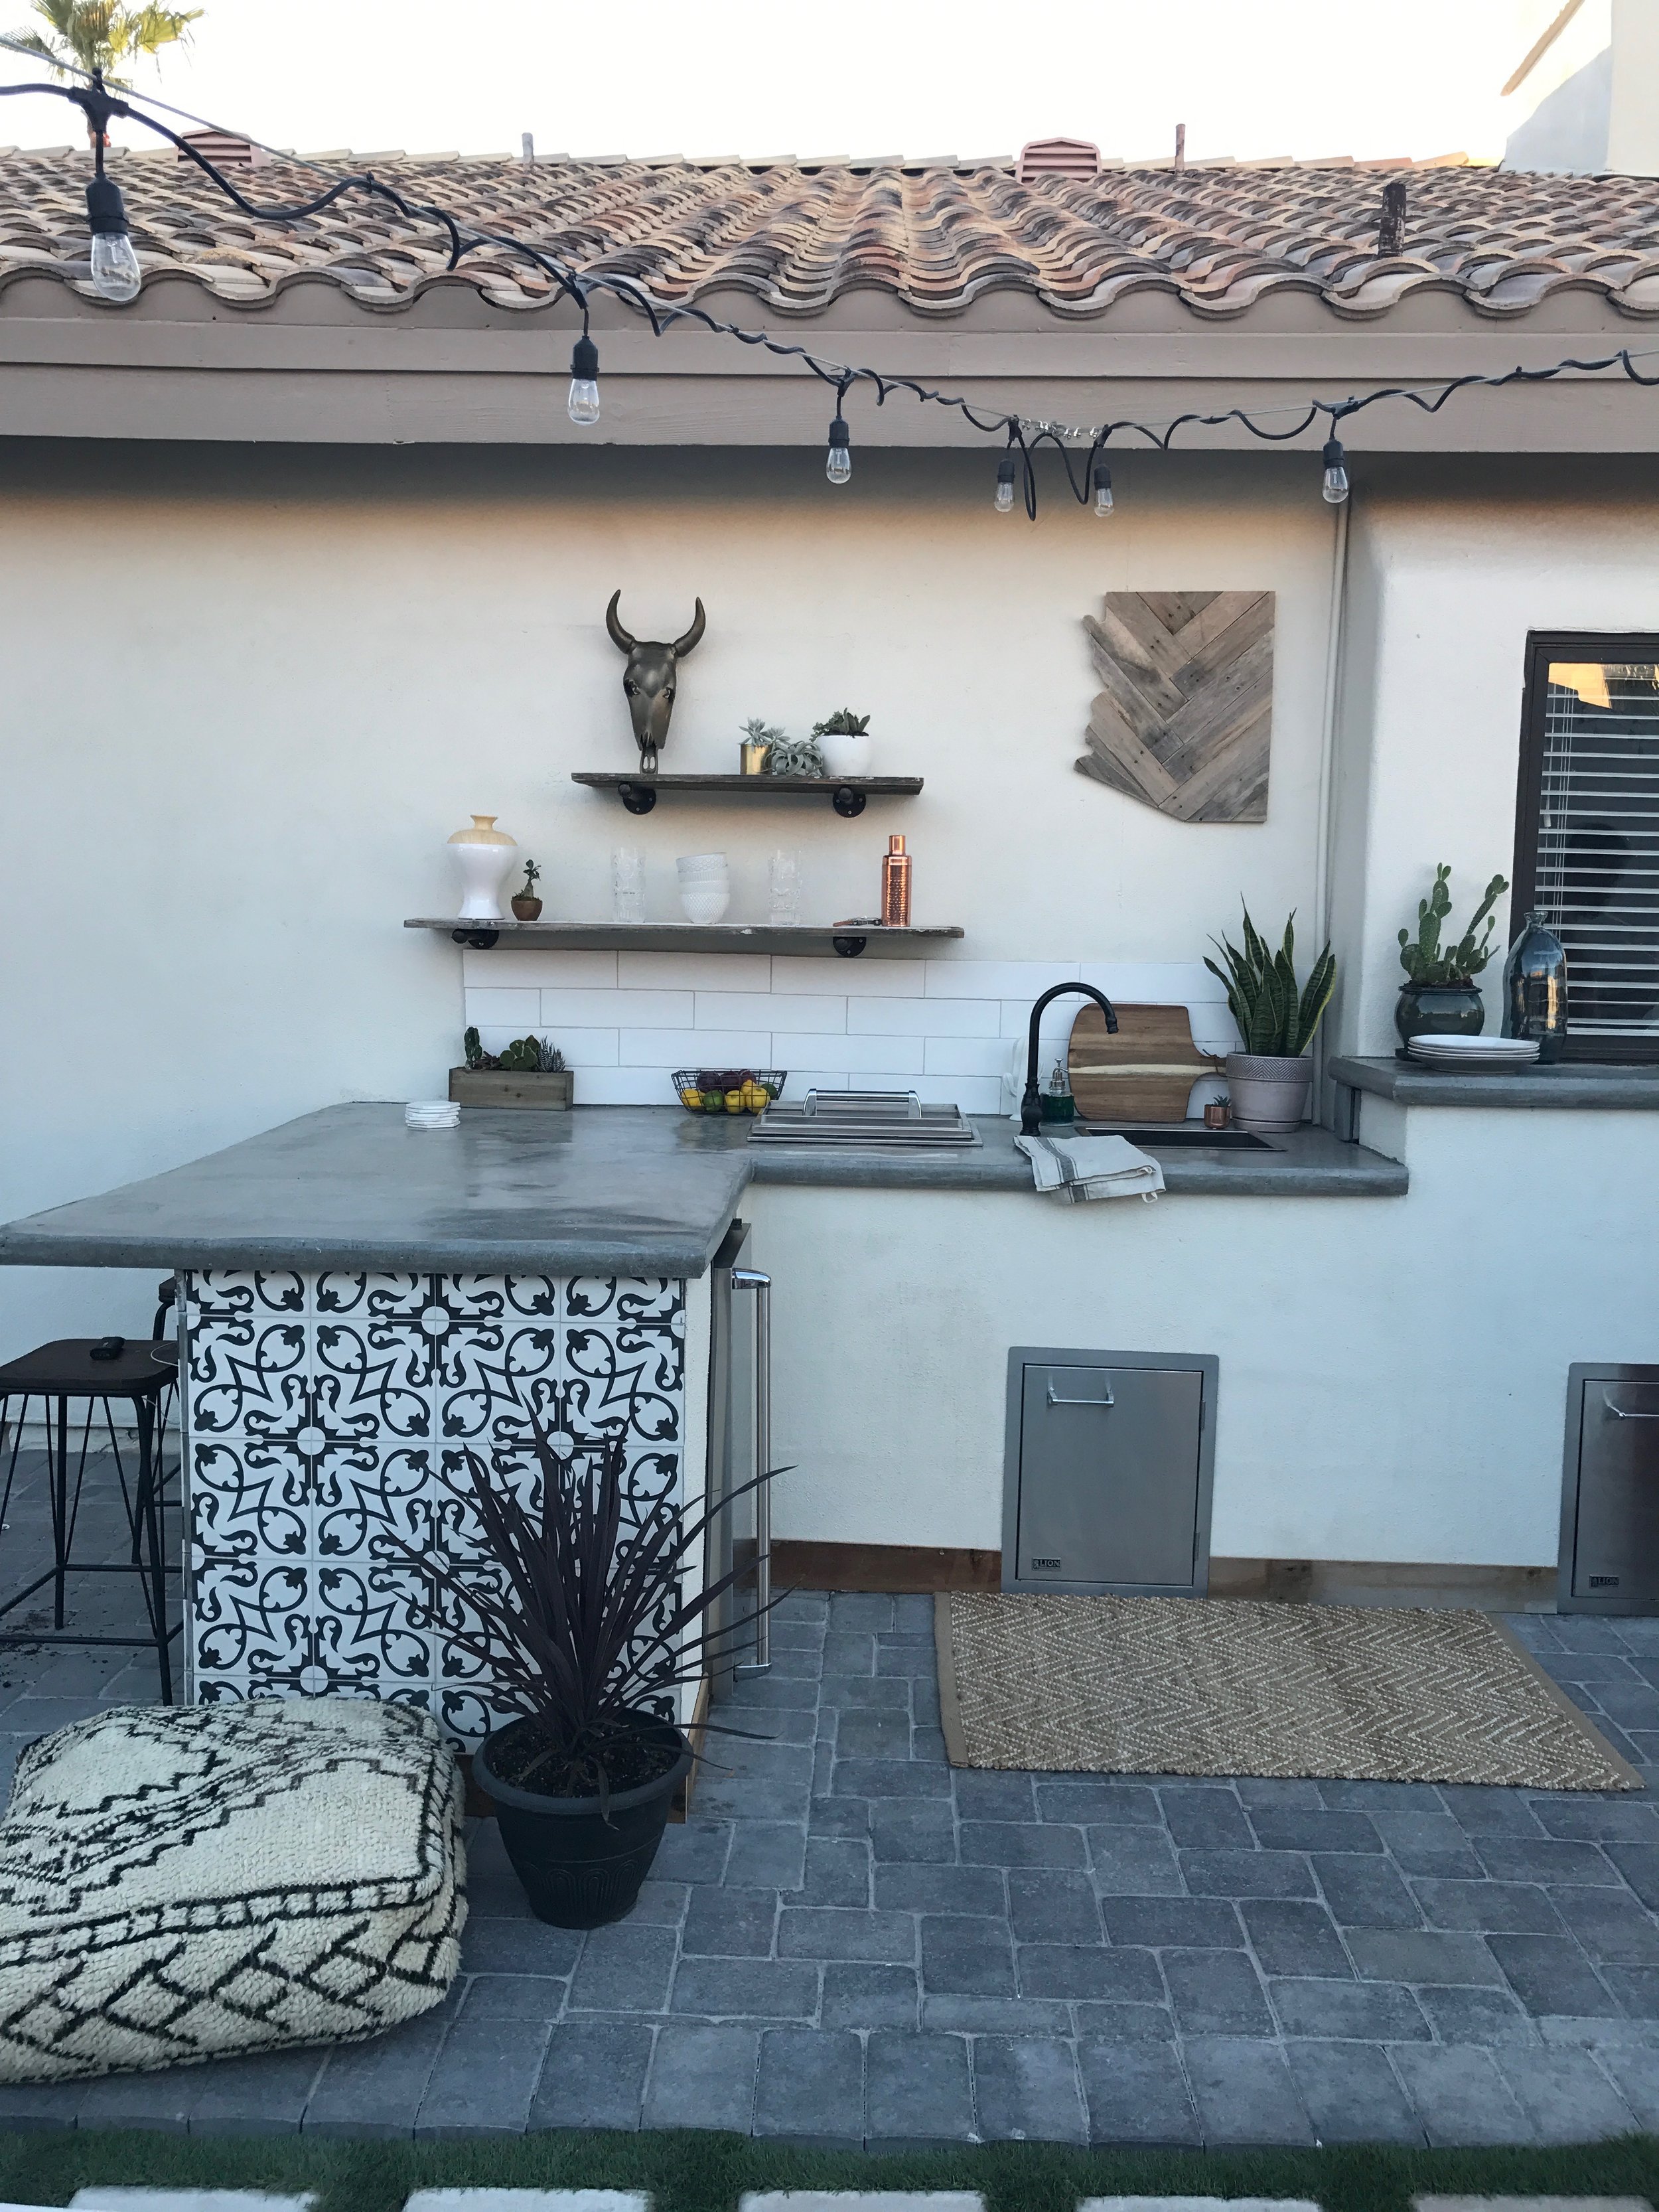
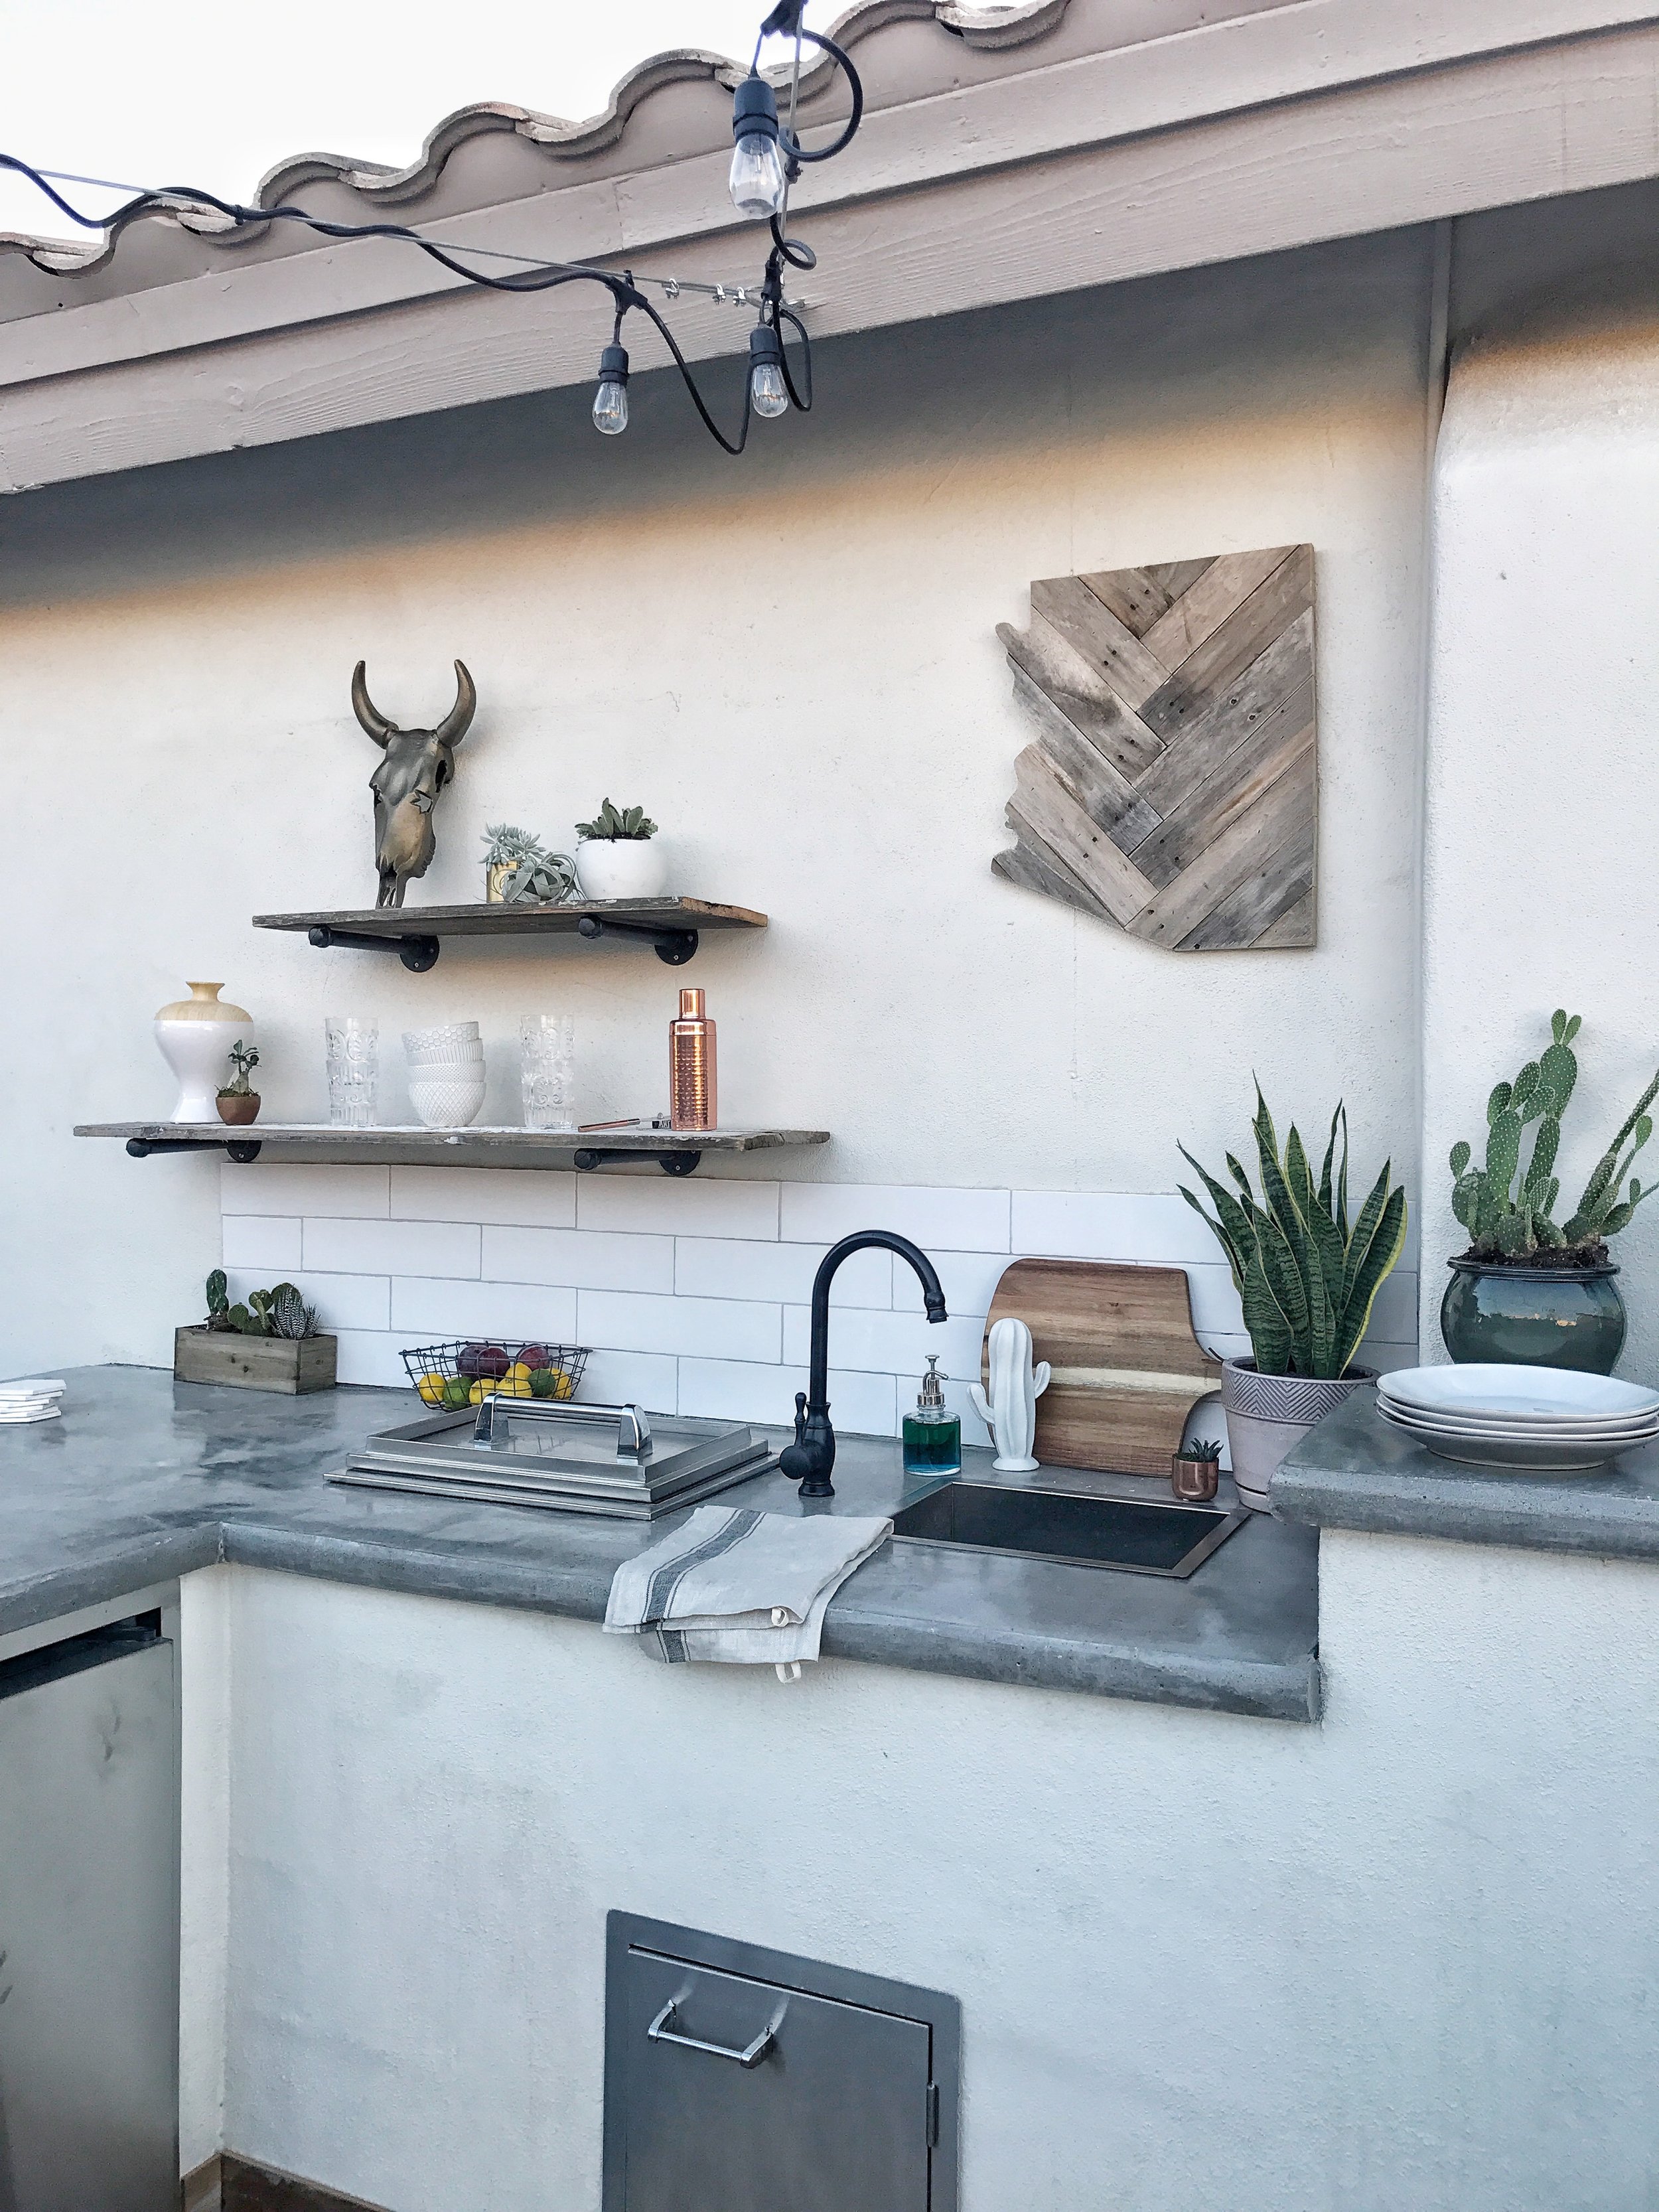
Part 1- Plan the space. Sounds easy but on your own house NOT! I spent a couple afternoons with measuring tape and graph paper just to get an idea of size. Luckily I was using a pencil so I could keep erasing the elongated bar and then putting it back in! Ultimately I decided on the U shape, small bar, sink, backed the kitchen window for a servery and was open to the yard, seating area behind and had a bar space.
Part 2- Appliances. Whoa! So guess what my appliance almost cost the same as my demo, pavers, block kitchen with stucco (no counters) but still! It was a bit of a humbling experience. Any of you that follow me or know me that I can be a bit high maintenance. Time to be practical. I live in a gorgeous but modest tract home in the Ahwatukee foothills. Not the type of house that you just shoot the lock off and put in Viking appliances. It must be the investor in me that screams STOP NO! DANGER! in my head- or I'm crazy- possibly both. Ultimately we decided on Lion. Decent pricing, good reviews and enough beauty and power for my abode. We ordered a refrigerator, side burner, ice chest, double door and a single drawer. Pay close attention to what I ordered and you will soon see my first mistake. Also included was a upper countertop to meet the kitchen window and a sink. Side note- we chose a refrigerator that was another $200 we got the same refrigerator and in a separate box an expensive door. I'd say that was the only disappointment the rest of the appliances are perfect!
Part 3- Lets demo, build the shell, stucco and plan spacing for the doors and appliances. Easy. Suns out workers are here. I print all the spec sheets and.... record skip. These guys finish the kitchen and we discover that 75% of the openings are wrong. Oops- I like seriously was babysitting pretty hard but I guess sometimes that language barrier doesn't help. So I call my main man and let him know, he sends them in and they fix... a week later. Also if you know me you know that I think everything happens in a day or week and can be a tad unrealistic about timelines.


Part 4- Check openings, plan install of appliances and frame counter. Here is where if you paid attention to what I ordered... this is where it went wrong. Side burner- instead of sugar plum fairies in my dreams I had visions of steaming clams and crab OUTSIDE so I would not smell up my house. NO. I had measured counted- ten times counted and how could this be? Might want to consider that the kitchen is made out of blocks so there are some restrictions that come with that! If I were doing a kitchen in a more expensive house it would have been masonry obviously. So in the end it happened that there is no burner. It doesn't fit it and cannot be made to fit. Glad to report- I'm still alive though and love my kitchen
Part 5- Countertops. Fast forward a couple months. Its like 115 out every day, we are in the throes of flipping, clients staging vacate rentals and everything in between. Now it's time to plan for the countertops. Build forms, mix up- whats the hold up?? Oh still the heat. Finally we are ready its now low 100's upper 90's. Working with grout- concrete - paint in a dry heat is something you need to plan for. Counter was drying so fast we needed both Tom and Vinny mixing and pouring to make this happen. In our case we like to pour in place using forms we order in. Once the concrete is poured, it needs to be vibrated to get rid of air bubbles, and it seriously isn't perfect. I get calls for designs or counters and my answer is yes- but you are required to come over and see mine.

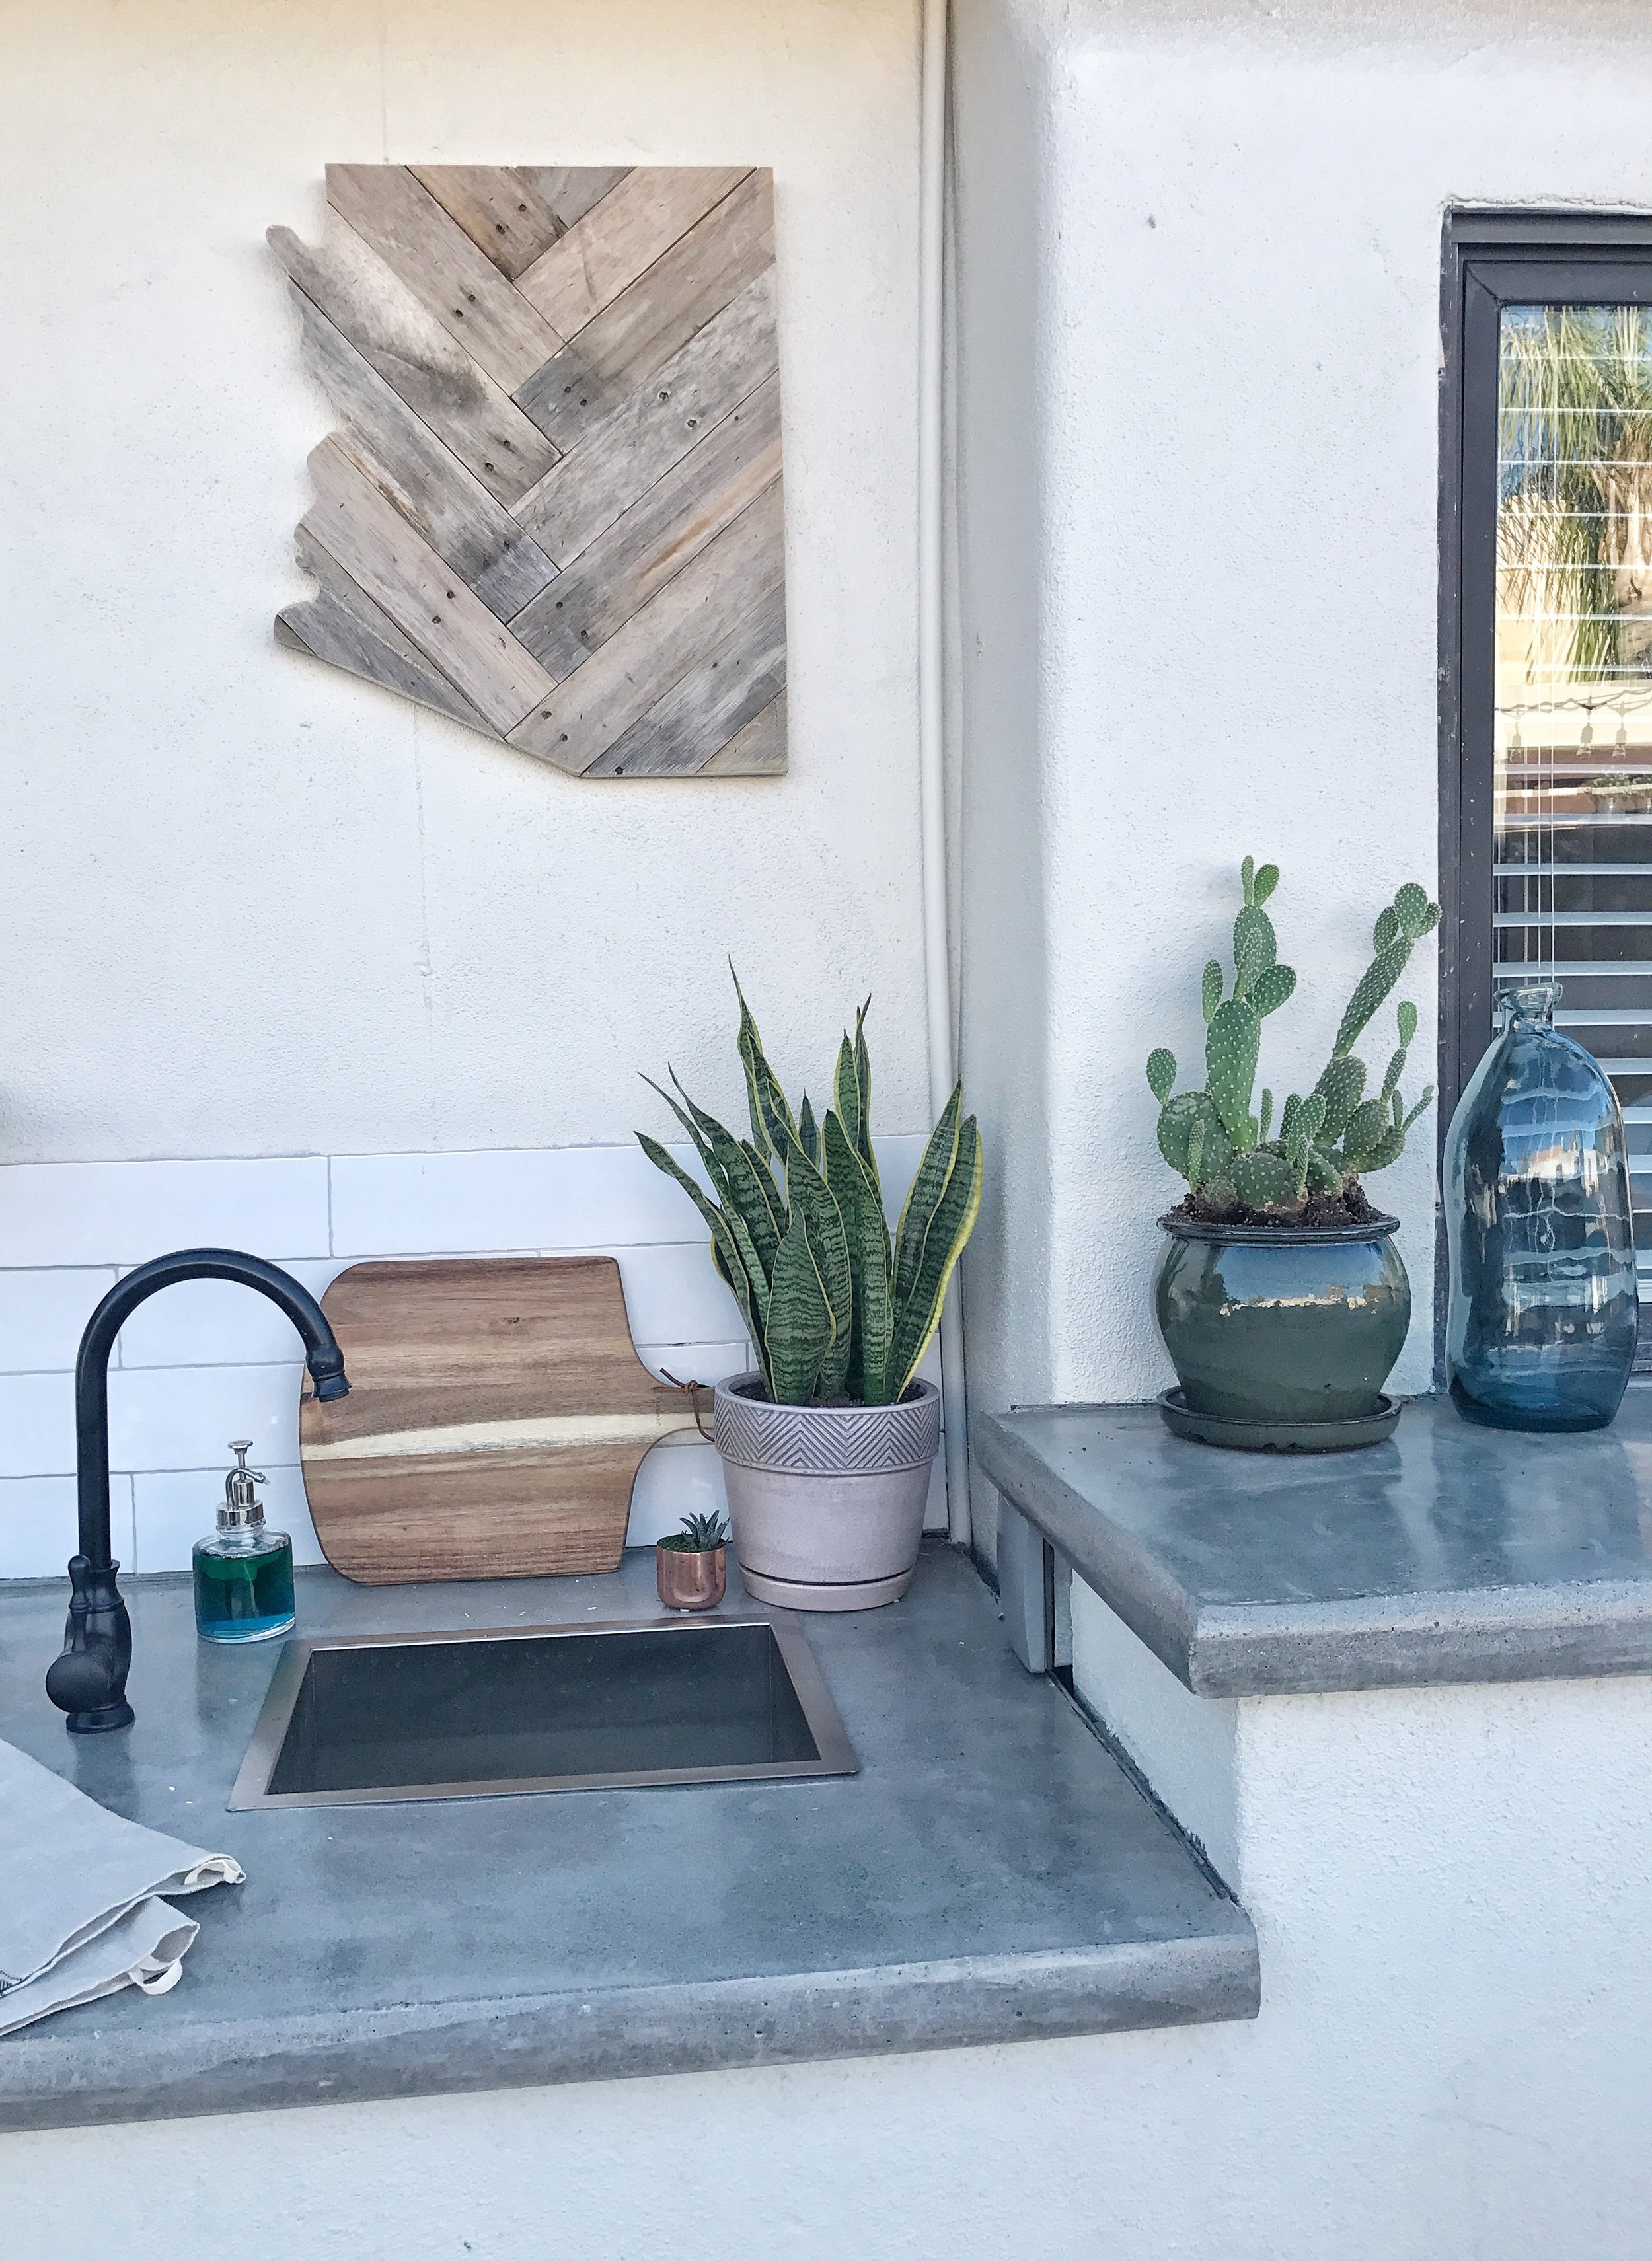
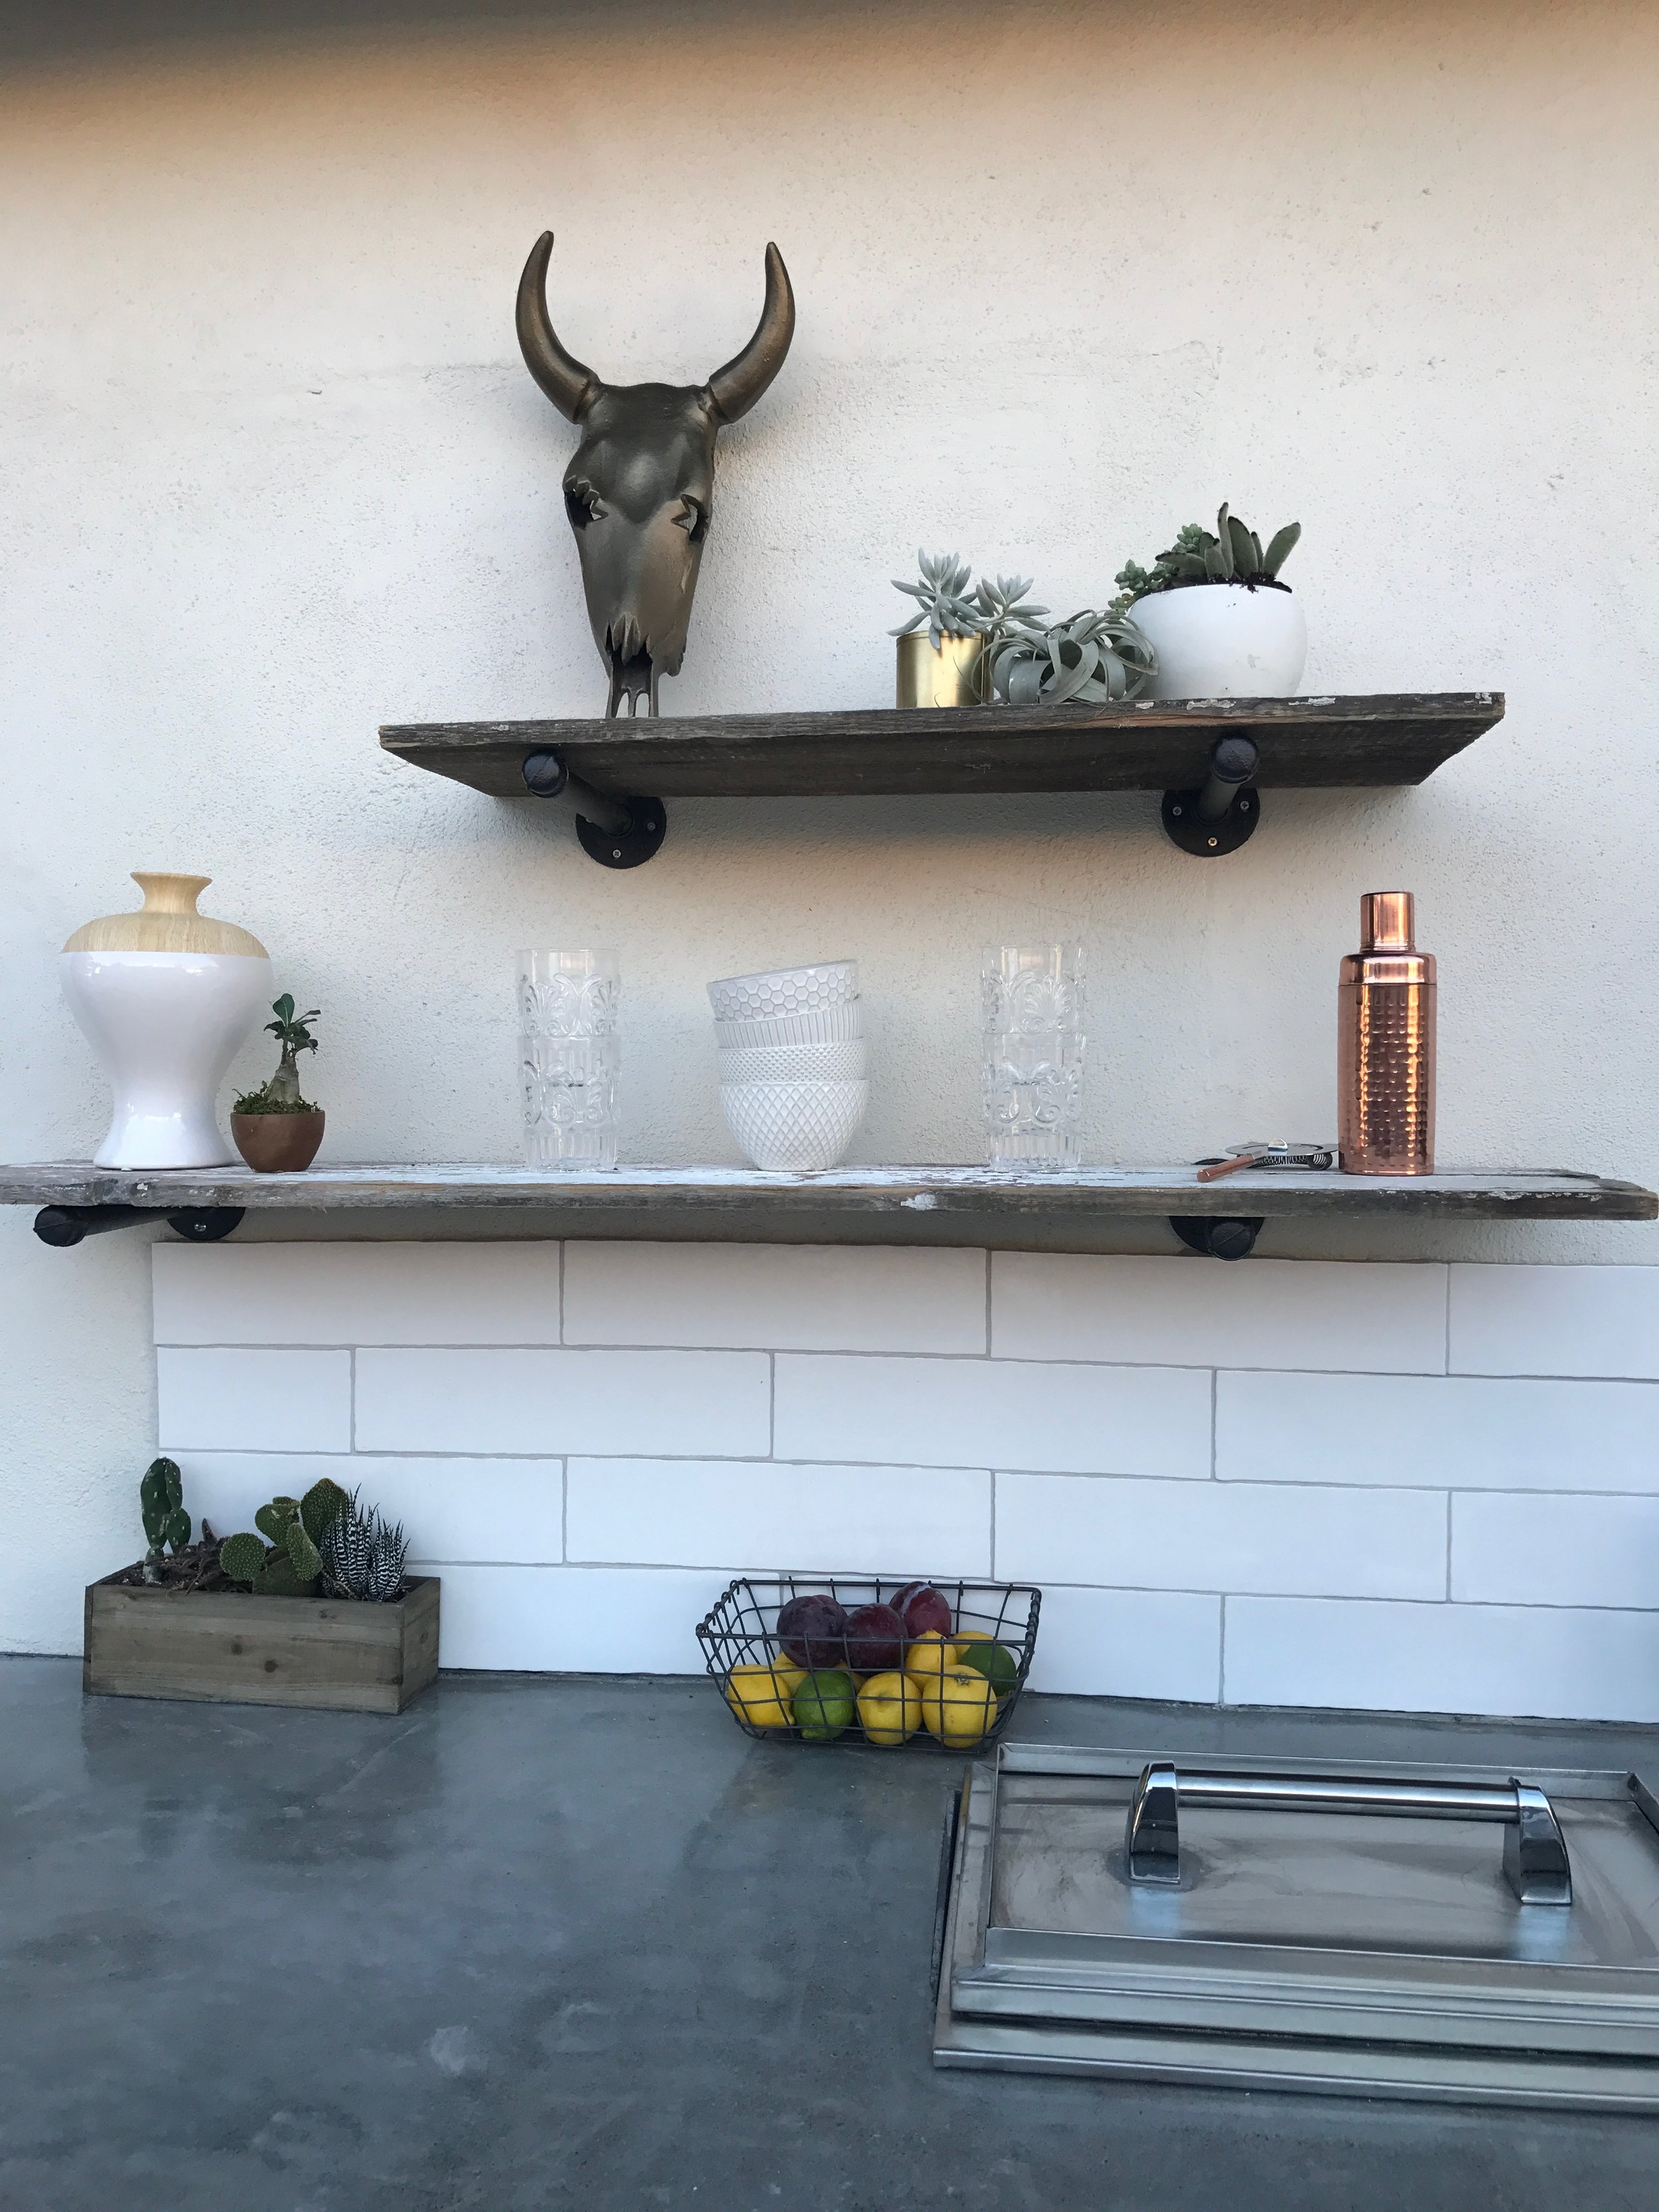
Part 6- Finish Finale. So all along we are into the technical stuff- much like the beginning of a flip and then we get to the fun! We decided that the outside of the kitchen would be wrapped in Cement tile and we would have a barn wood baseboard combined with pipe shelves. Here's some tips on Cement tile- 1. Its expensive so decide what you want, buy it and PAY ATTENTION to the install instructions. We did with no hiccups but I'm saying this because I feel like so many people just hurry along in excitement. The cement is porous and needs to be sealed (takes all of 5 min) before installation and again after grouting. If you are going to pay so much for tile you have no excuses. Also be careful handling it - it's brittle AF. For the trim I visited one of my vendors and chose a thin trim piece. We used construction adhesive to hold this in place, no nailing into stucco or cement tile. My vision was a bar with shelves for cute stuff and bottles. Easy for us we assembled and installed the pipes and then used barn wood for the shelves.


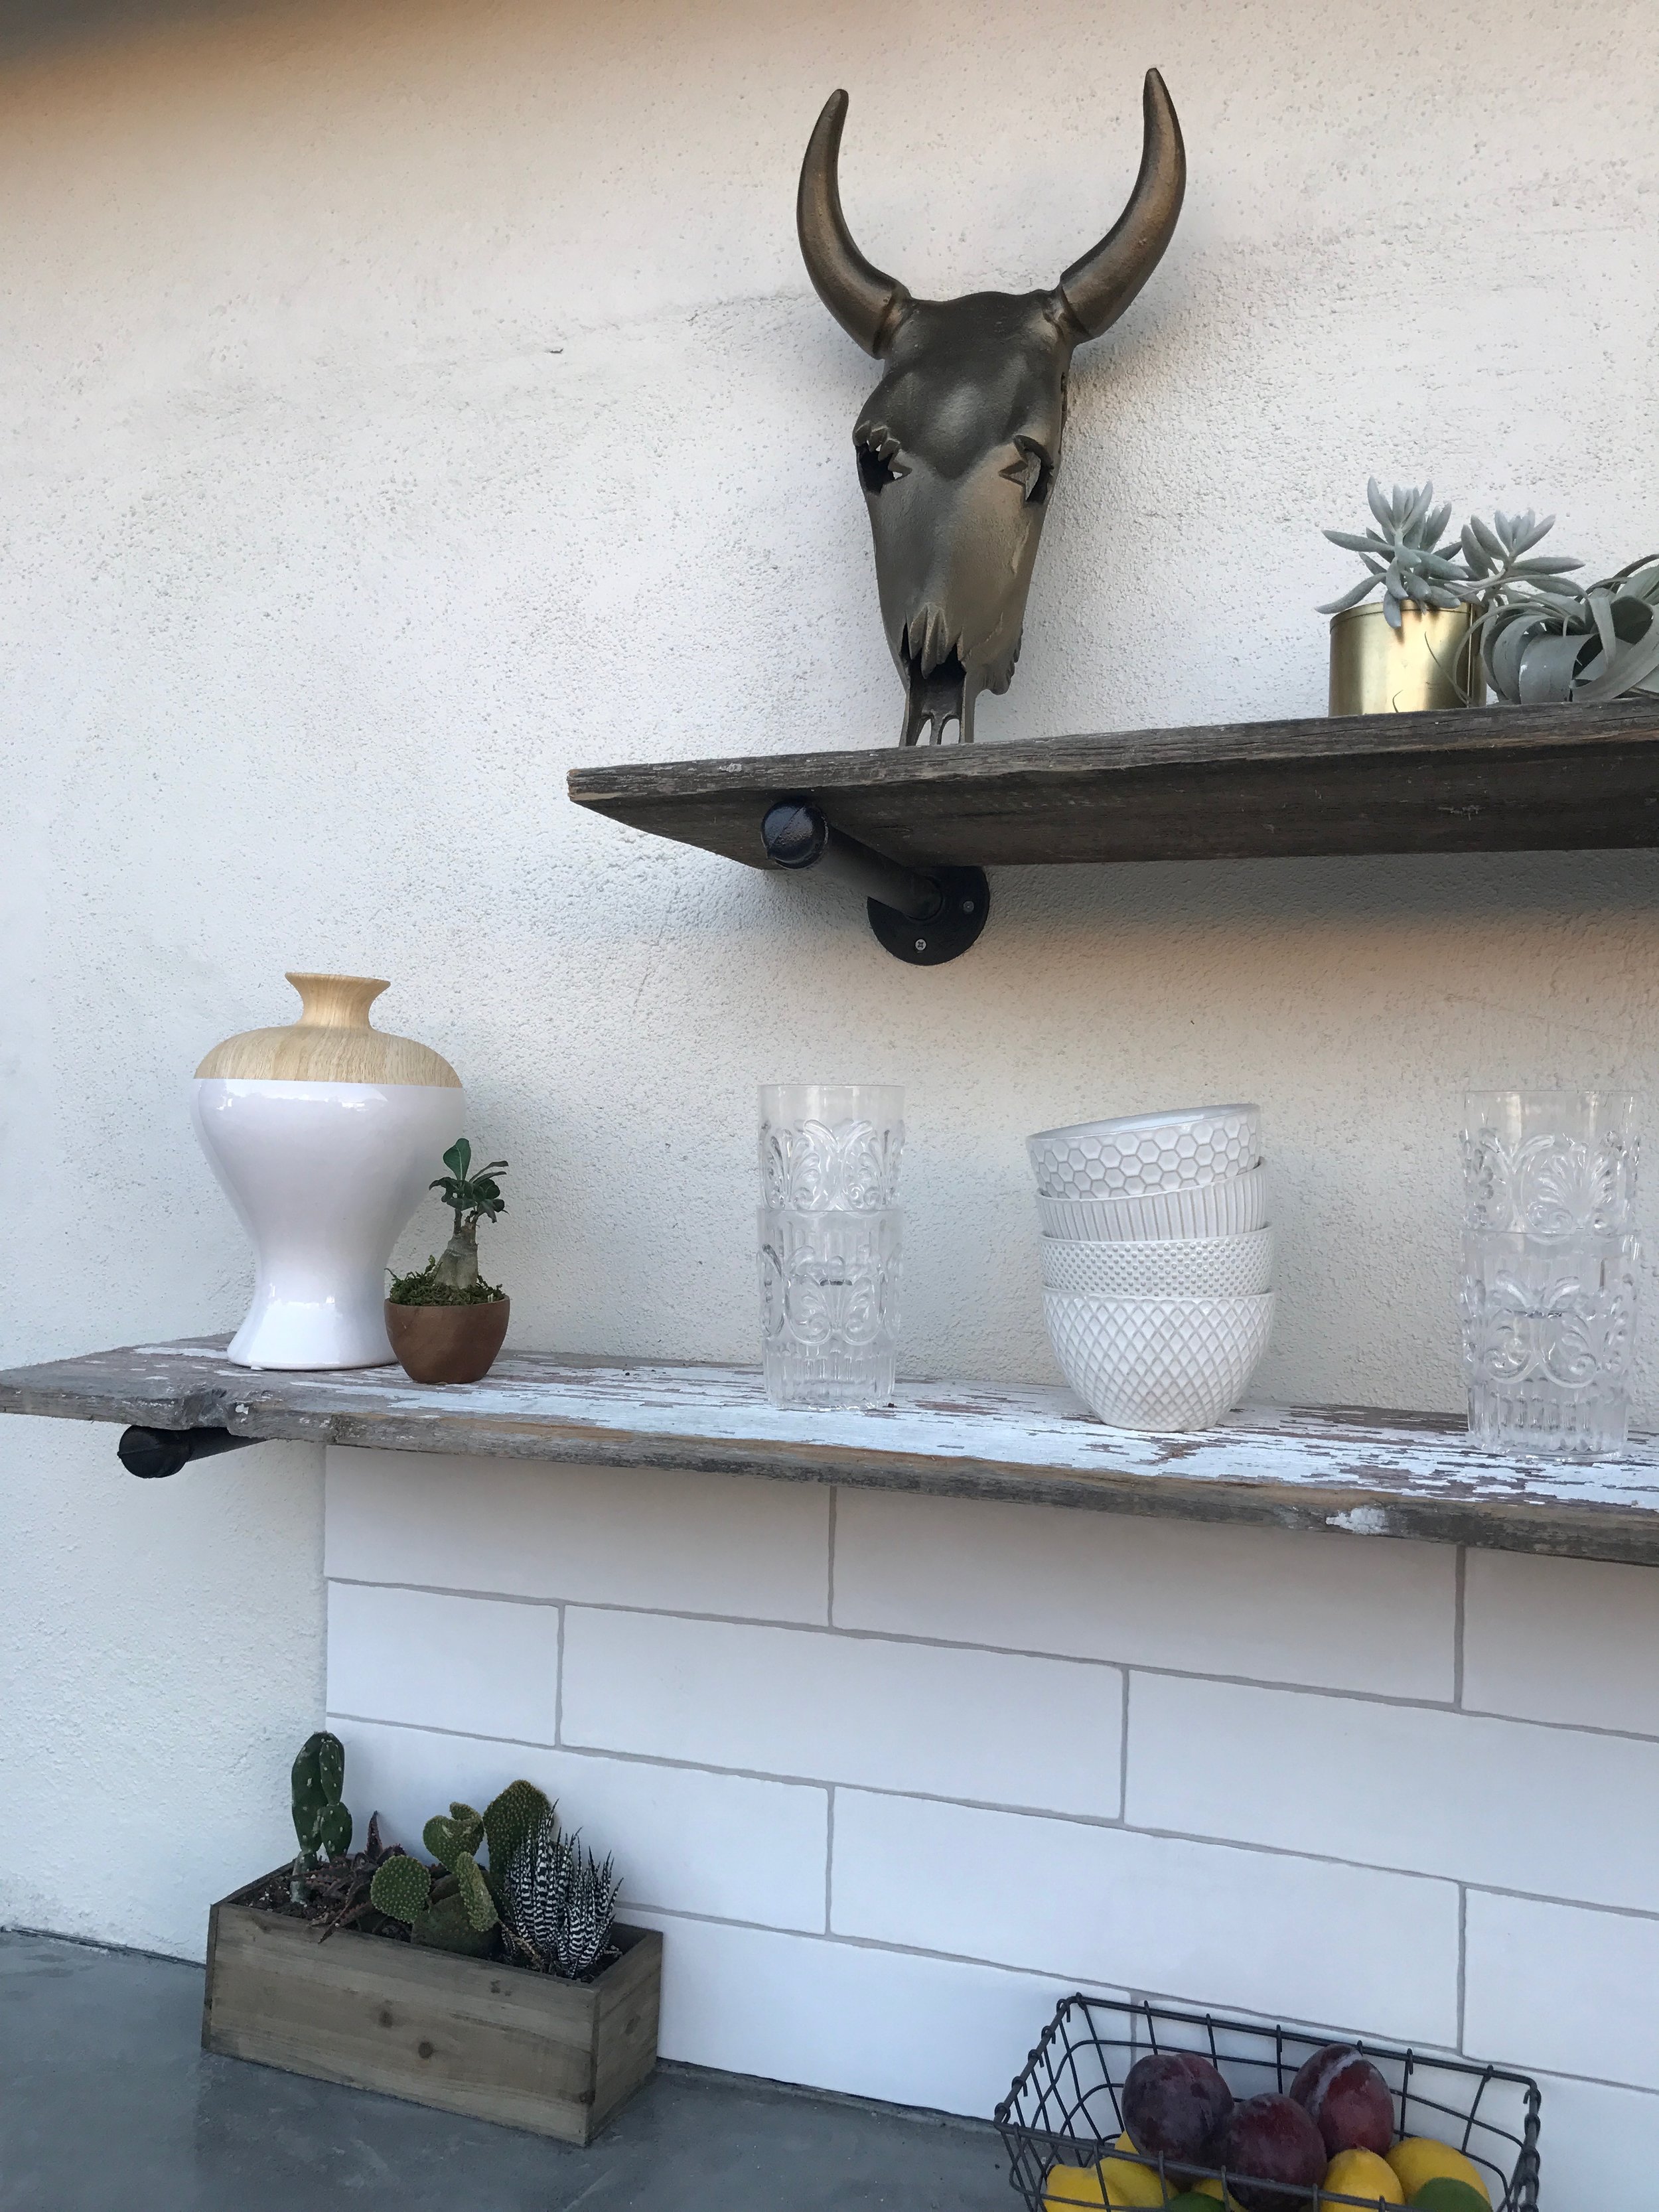
I then staged this, took photos and basically stood speechless staring for a while. Now that we have been using it for a couple months it is really everything we wanted and it is the perfect addition to our home!
If you would like your own outdoor kitchen design contact us for a consult!
